Dialog Scenes
Dialog Scenes is an alternative to CGs and Scene Backgrounds. You can use it to load unreal levels directly in the background and have them displayed in realtime instead of using prerendered scenes.
Setup
-
Click on File -> New Level (or Ctrl+N) and select a level template IMPORTANT: Dont use Open World Templates in Unreal Engine 5. The system currently works with sublevels, and therefore World Partition can be disabled.

- Design your level as you like.
- Place cameras inside the level so that they can be selected later on as the view targets during a dialog.
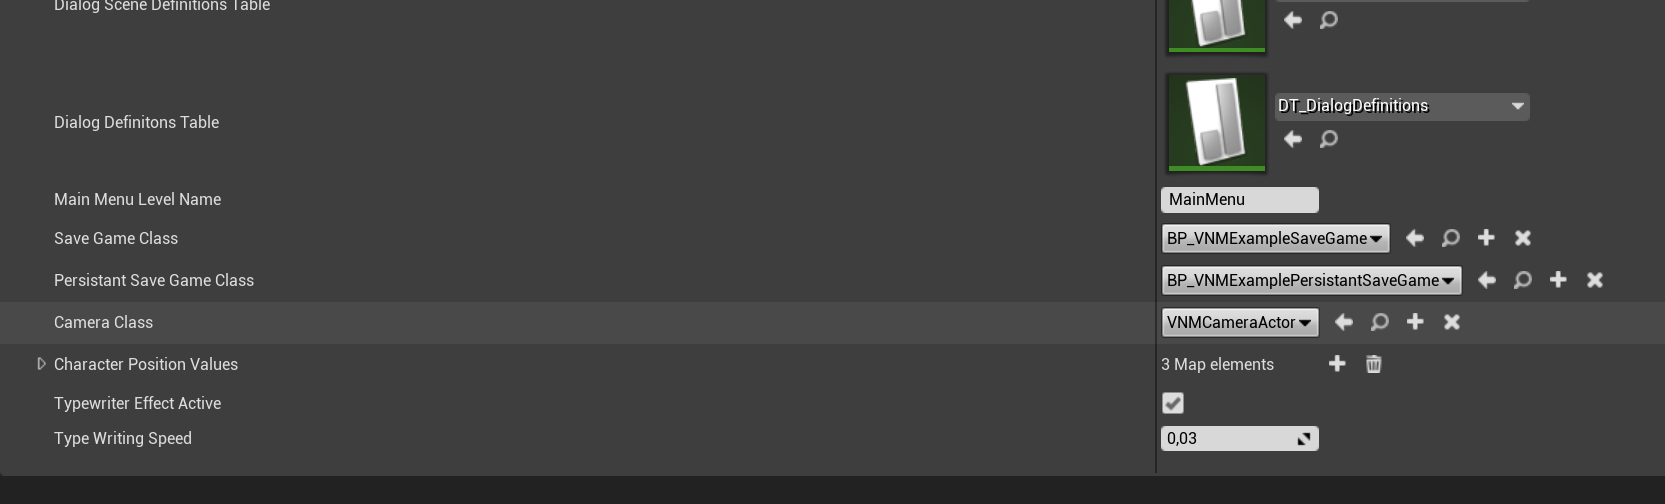
- Make sure to create a camera of the type specified in Project Settings -> Plugins -> VNM Settings -> Camera Class. Otherwise the system won’t find it.
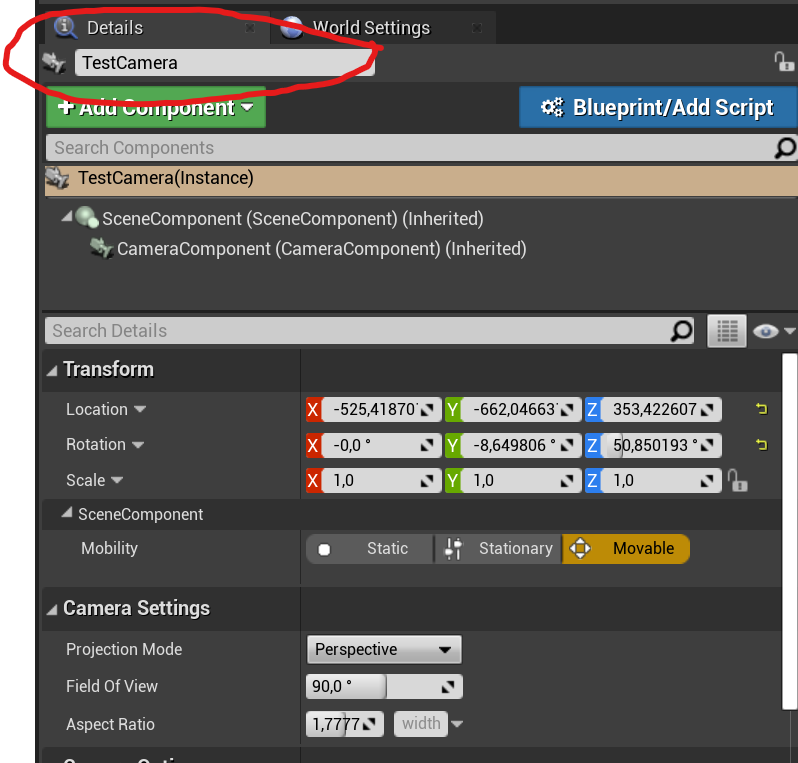
- You need to rename every single camera you place in the level. Do NOT leave them with their default name, as otherwise the system will not be able to switch to your placed camera.
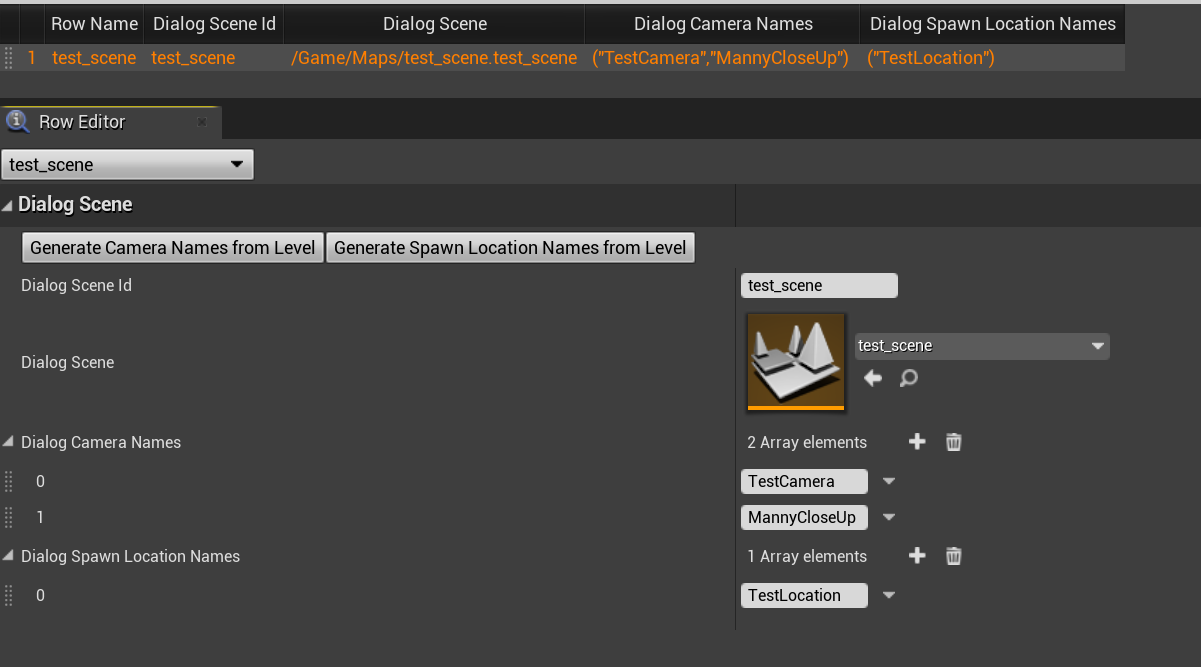
- Go to the Dialog Scene Definitions Data Table and add your level.
- Set the Dialog Scene to your previously created level.
- Either manually enter all the names of the cameras in the level or press the “Regenerate Camera Names” Button in the definition. The names of the cameras should then appear in the array below. As long as they appear in the field below, everything worked out correctly. After closing and opening the datatable, it should also appear correctly in the tabular view at the top.
- Dialog Spawn Locations are relevant if you want to use 3D Characters.
- Open your main ingame level.
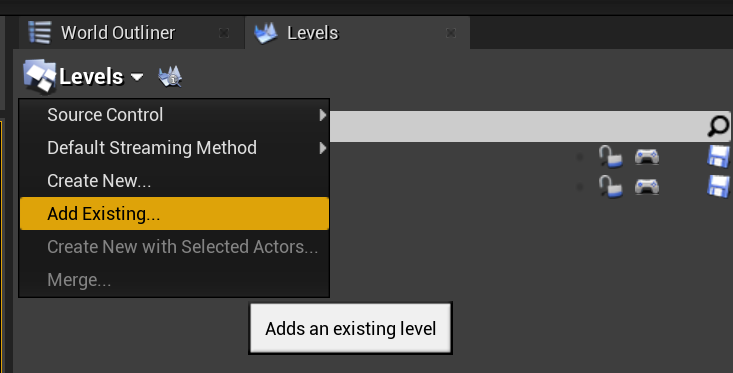
- Open the Levels Window. It can be found in Window -> Levels
-
In the Levels Windows select add level and then select your level in the window that has opened.
-
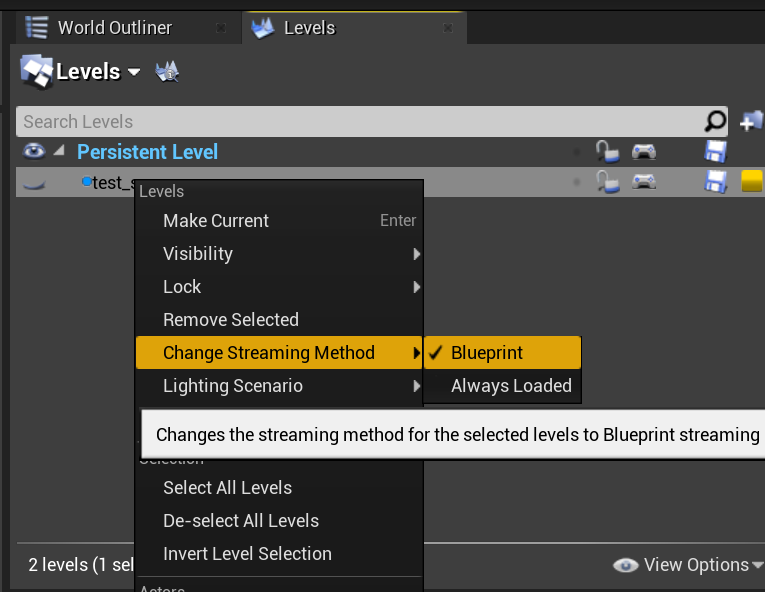
After having added your level to your ingame level, make sure to select “Streaming Method” to “Blueprint” instead of “Always Loaded”.
Usage
To now display and hide the scene, you can use the Dialog Scene Show Node and Dialog Scene Hide Node. Different to the other system, there is no transition system for the Dialog Scene Nodesk, meaning it will simply appear for now, once loaded.
If you want to now switch between all the cameras that you placed in the level during the Setup Section, you can use Dialog Scene Switch Camera Node. With this node you can switch between two cameras instantaneously or with blending. If you set the Blend Time to 0, it will jump directly to the next camera.
You might have also seen the camera field on the Dialog Scene Show Node. This is there to directly set the view to a specific camera after loading the level, as otherwise the view could be in odd places.

dialog.text -character=cube -emotion=Idle "Let's look at 3d scenes."
dialogscene.show -id=test_scene camera=TestCamera
dialog.text -character=cube -emotion=Idle "Let's change the view!"
dialogscene.switchcamera -id=test_scene camera=TestCamera
dialog.text -character=cube -emotion=Idle "It looks amazing!"
dialogscene.hide
dialog.text -character=cube -emotion=Idle "And it's gone again."
dialog.end -nextdialog=start