Image Layering
Sometimes in a Visual Novel you might want to save some time on art by only needing to redraw a face for example and not the whole character again. It also reduces the size of the game. For this purpose the image layering system exists. You could for example use the character emotion system for showing the character in different emotional body states, and the face is handled via the layering system. Through this you dont need to create each body emotion image with each facial emotion image.
Setup
First step is to add the layers to the Character Definition in the Character Definitions Table. In there you will find a map field called “Character Image Layers”. This is your entry point to the image layering system for characters. The key of an element is the id of the layer, for example “face”. In the Image Layer Definition the Layer Id should be set to the same value, in this case “face”. In the definition you also have to define the Layer Index. This is used to set the z-order of the layers. In terms of z-ordering, the base emotion image is the furthest back followed by the layer with index 0. Index 9 is the furthest in front. Lastly you need to fill the map field “Layer Image Per Id”. The key of the map is the value shown to you when using the layering nodes. The value is the actual image. In the context of the above mentioned example, you would add all your facial expressions in here.
For CGs and Scene Backgrounds the system works the same. Their definitions have a map field called “Dialog Image Layers” which behaves in the exact same way.
Usage in the Dialog Blueprint
To now use the layering in the dialog blueprint a few things have to be made sure. You can only add layers to a character/cg/scene background if the image is currently displayed. Otherwise nothing happens. There is a Add and Remove node for all three image types.
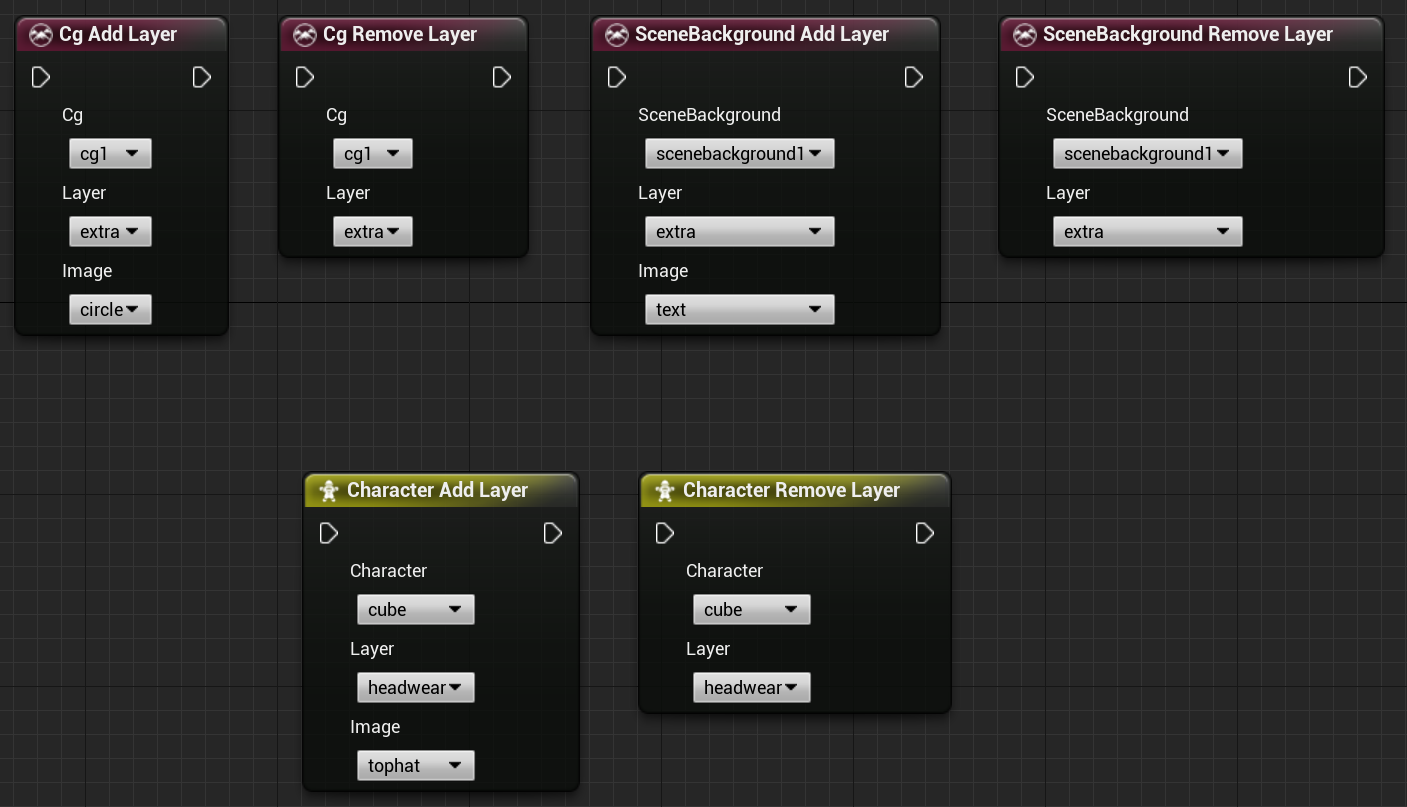
cg.addlayer -id=cg1 -layer=extra -image=circle
cg.removelayer -id=cg1 -layer=extra
scenebackground.addlayer -id=cg1 -layer=extra -image=text
scenebackground.removelayer -id=cg1 -layer=extra
character.addlayer -id=cg1 -layer=headwear -image=tophat
character.removelayer -id=cg1 -layer=headwear
If you want to add a layer with a specific image to the image use the corresponding Add Layer Node. If you want to switch the content of a layer just use the corresponding Add Layer Node again with the different Image Id for that specific layer id. If you want to remove a layer again you can use the corresponding Remove Layer Node. At the moment the Image Layering system does not support an animation system when switching layers.
You don’t need to remove layers before hiding a character. On hiding the character, all layers will be removed as well.